How to Fix Rotating Mini Headlight Bolts.

Mini Headlight Bolts, mainly mini models R55, R56, R57, R58, R5,9 R60, R61 (Link to part numbers) have a habit of corroding inside their housing. The headlight bolts screw into captive nuts, moulded into the plastic housing. When undoing the headlight bolts, if the bolts are seized (corroded), the captive nuts break free. You then can’t undo the bolts, as they just go round and round, without ever coming loose. They just won’t come undone!
Topics:
- Video:
- More Detail:
- Image Gallery:
More Detail:
First, a brief statement on inherently bad design issues…
When finding an issue, I’m just the same as anyone else. I’ll be scratching my head, going “what the…”. I must admit, in this day and age you would hope design issues like this would have been discovered and ironed out long before it went into production. But unfortunetly, round every corner there’s a fault or issue waiting to happen. We’re only human of course. Now where’s the robot that built this… 😃
How to Fix the Mini Headlight Bolts Rotating
(when they won’t come out!)

Topics:
- The Bolt(s) Won’t Come Undone?
- Getting the Captive Bolt Out.
- What Parts do I Need?
- Buying Parts:
- Repairing & Replacing the Captive Nut.
The Bolt(s) Won’t Come Undone?
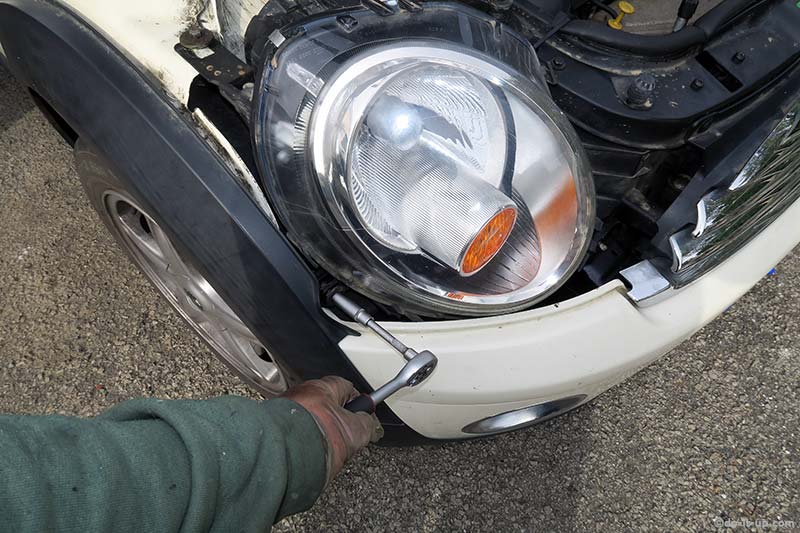
I tried to undo the headlight fixing bolts, but the captive nut just kept going round & round..?


Here’s one of the headlight bolts and the different components…
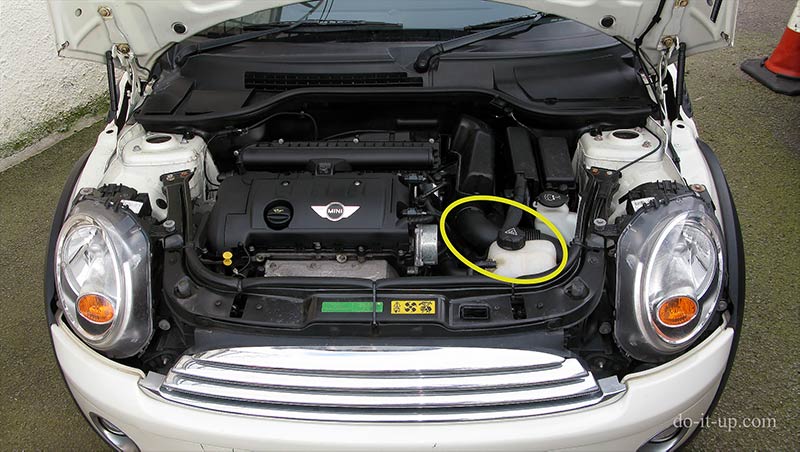
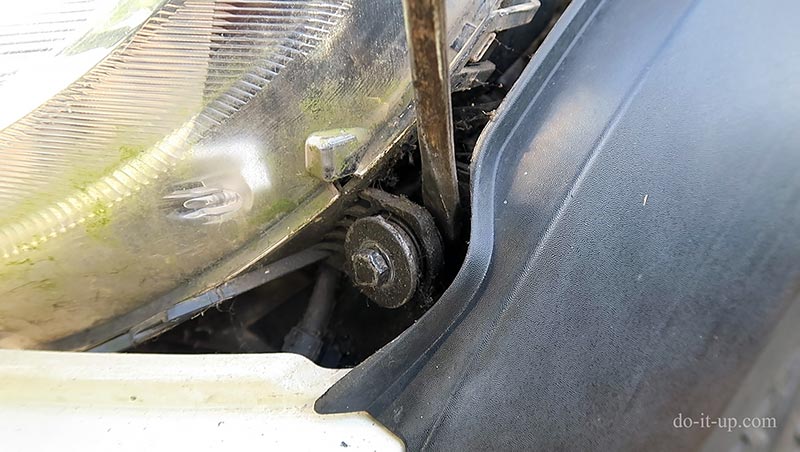
I tried to grab the fixing From behind, but I needed to move the air intake pipe & the water expansion chamber. There wasn’t much of the captive nut to grab hold of, and the bolt was seized tightly in place.
I failed. I just couldn’t undo the bolt!
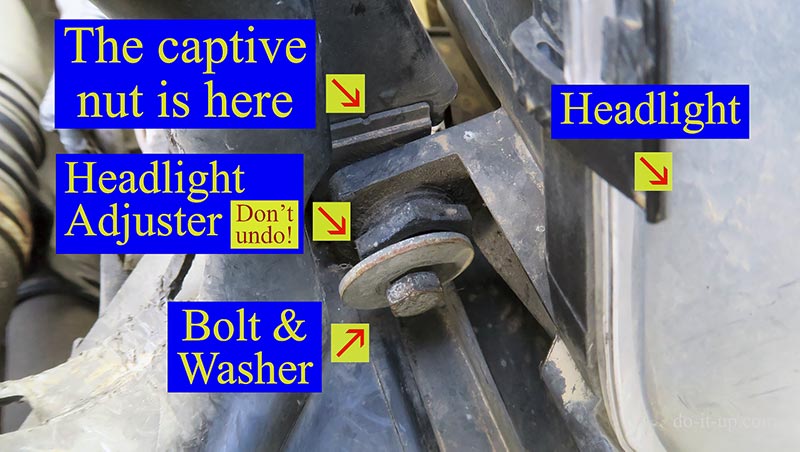
Notes:
- Don’t undo the headlight adjuster, (unless you’re adjusting the headlights)!
How to Get the Captive Bolt Out.
So, how do I get the bolts undone?
- The captive nuts are held in place by a plastic mounting bracket…

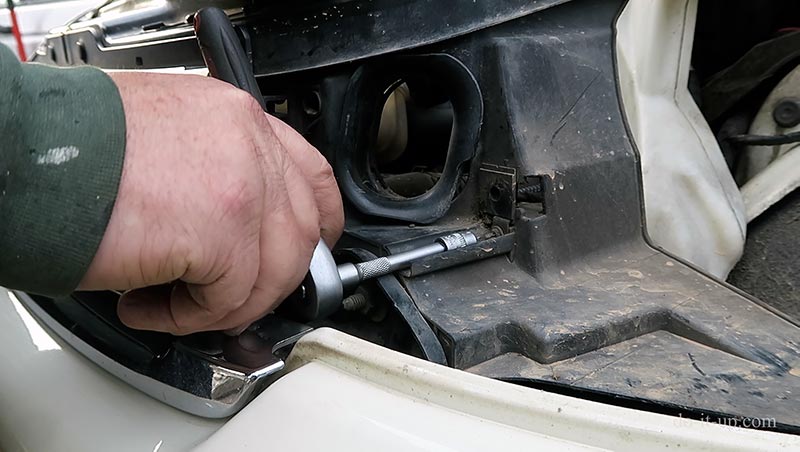
- Using a bit of heat (from friction). We can remove the rotating captive nut whilst it’s fixed to the bolt! For this we need a drill or a powered driver…
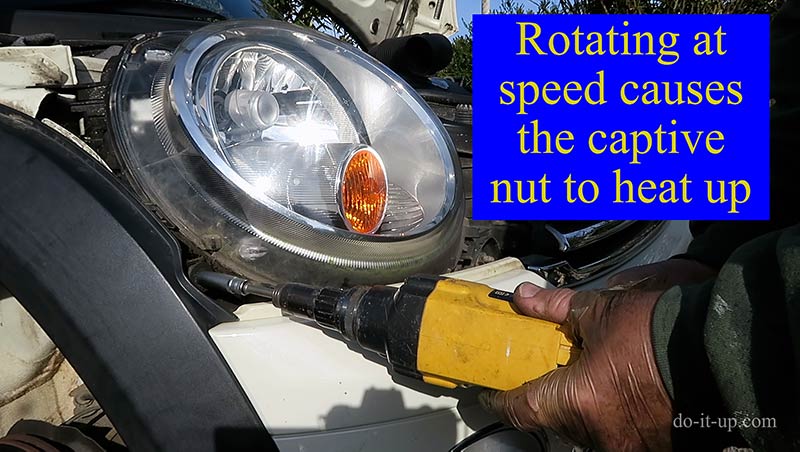
- Rotating at speed causes the captive nut to heat up. Gently levering the bolt out speeds things up! But don’t lever off anything that can break.
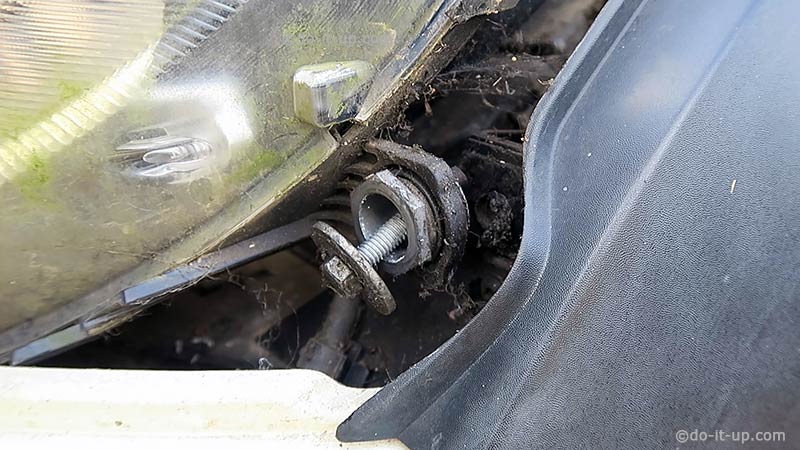
- The Bolt (and the captive nut) has been removed.

What Parts do I Need?
You could repair the mini headlight mounting bracket in the following ways:
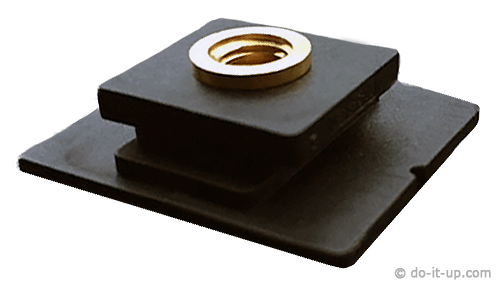
1. New ‘Original’ Captive Nuts?
You could buy new captive nuts with their brackets. See the section below: Remove the captive nut mounting bracket…

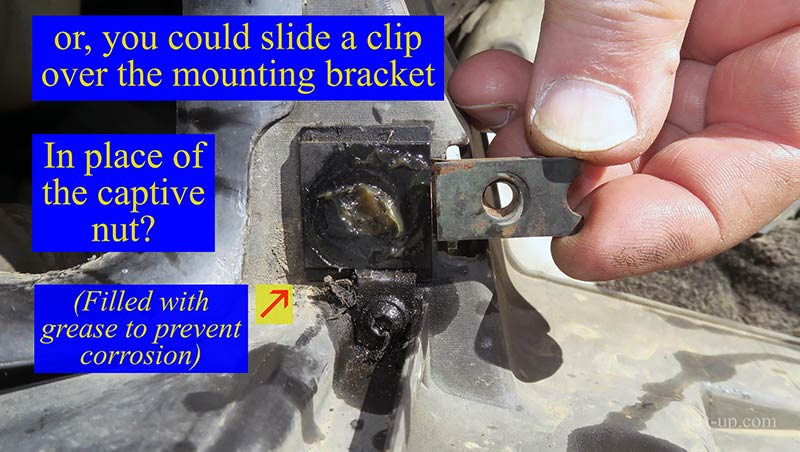
2. U-Clips?
Or, you could slide a clip over the mounting bracket In place of the captive nut (Filled with grease to prevent corrosion)?
3. Nuts & Bolts?
Or, we can insert a new ‘captive’ nut with some heat. See the section below: How to Repair & Replace the Captive Nut (Nut & Bolt Method).
- Using a blow torch,
- A gas stove,
- Or, another heat source…
Notes:
- Always check with your ‘other half’ before using the stove. You don’t want to end up in the dog house!
Buying Parts:
If you’re not sure what parts you need, sometimes it’s good to have to look to see what’s available? The list below may give you an idea of what’s available to buy and how much they are…
| Mini Captive Nuts, Bolts, etc… | |
|---|---|
| Item | Location |
| ‘Original’ Captive Nut Bracket Mini Part No. 63122752224 |
 |
 |
|
 |
|
 |
|
 |
|
| U-Clips M6 |
|
|
|
|
|
|
|
|
|
| Nuts & Bolts M6 |
|
|
|
|
|
|
|
|
|

Thank you for your support.
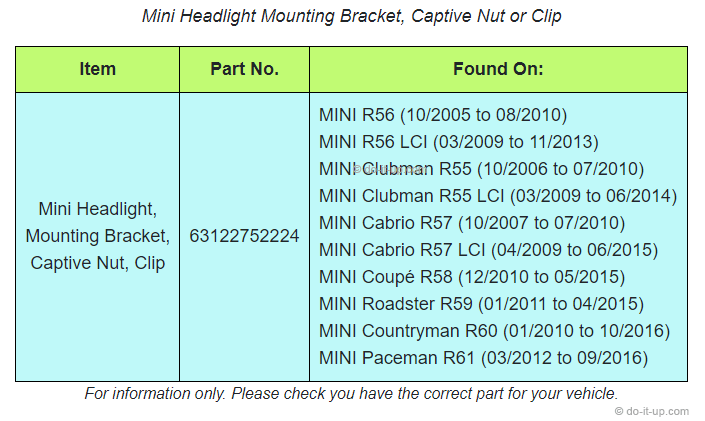
Original Part Numbers:
Mini Headlight Mounting Bracket, Captive Nut or Clip
| Item | Part No. | Found On: |
|---|---|---|
| Mini Headlight, Mounting Bracket, Captive Nut, Clip |
63122752224 | MINI R56 (10/2005 to 08/2010) MINI R56 LCI (03/2009 to 11/2013) MINI Clubman R55 (10/2006 to 07/2010) MINI Clubman R55 LCI (03/2009 to 06/2014) MINI Cabrio R57 (10/2007 to 07/2010) MINI Cabrio R57 LCI (04/2009 to 06/2015) MINI Coupé R58 (12/2010 to 05/2015) MINI Roadster R59 (01/2011 to 04/2015) MINI Countryman R60 (01/2010 to 10/2016) MINI Paceman R61 (03/2012 to 09/2016) |
How to Repair & Replace the Captive Nut (Nut & Bolt Method).
Repairing & replacing the captive nut (with the headlight removed).
Topics:
We can see the captive nut mounting bracket and the locking ‘adjusting’ Torx screw, (the captive nut has already been removed).

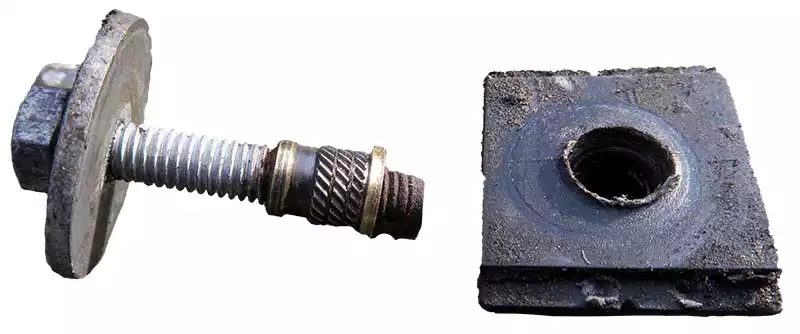
(Still attached to the Bolt)
Remove the Captive Nut Mounting Bracket:
- Remove the captive nut mounting bracket…
How to Repair the Mounting Bracket:
- Using New Captive Nuts (with their brackets)…
- Sliding a Clip Over the Mounting Bracket In Place of the Captive Nut (Filled with grease to prevent corrosion)?
- Inserting a New ‘Captive’ Nut with Some Heat…
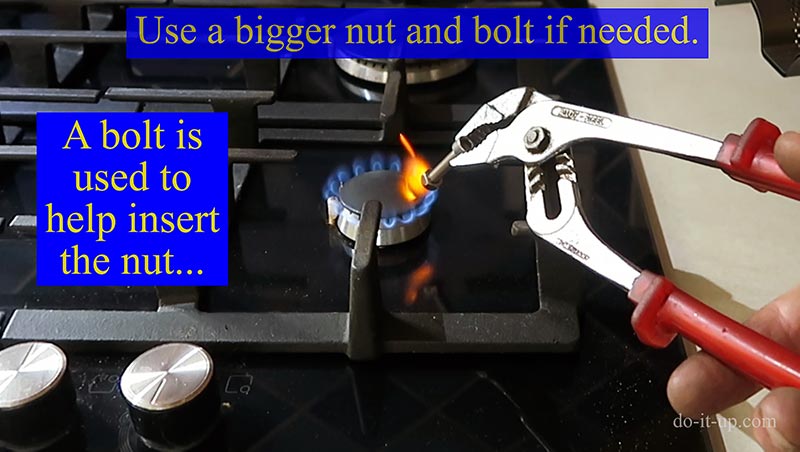
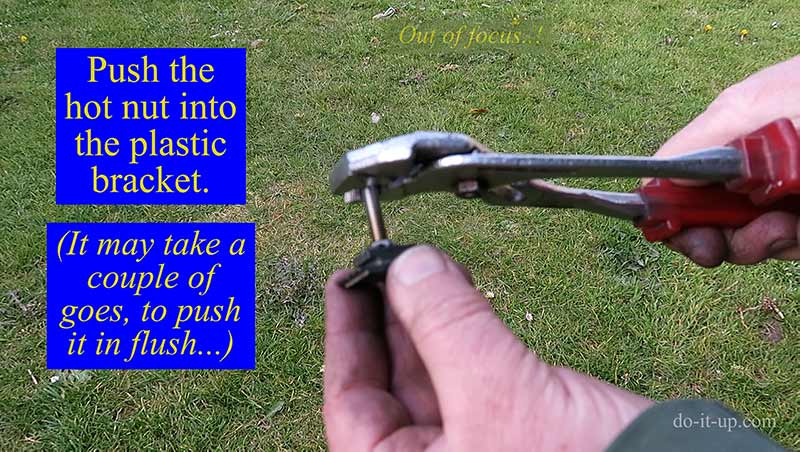
Heating up the nut
- A bolt is used to help insert the nut, (use a bigger nut and bolt if needed).
- Push the hot nut into the plastic bracket, (it may take a couple of goes, to push it in flush…).
- Make sure the nut is inserted in the back of the plastic bracket! So, the nut can’t pull out when the bolt is done up…
- If needed, trim away any excess melted plastic
- Replace the captive nut mounting bracket…
Refit the Headlight:
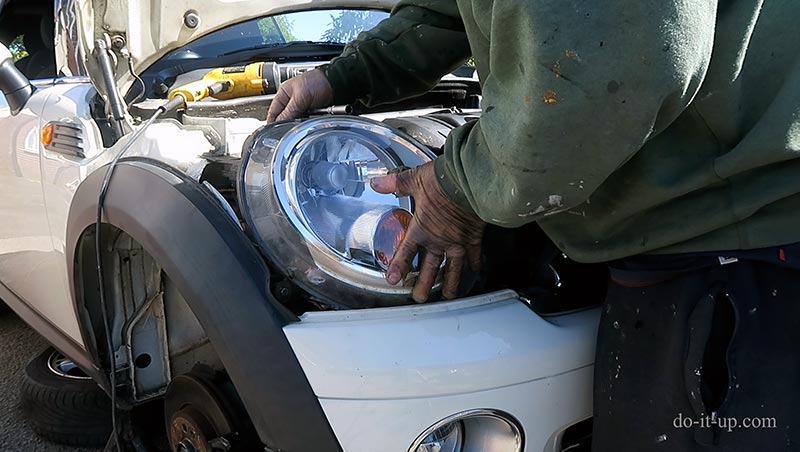
- lubricate the fixings, so they don’t seize again
- Add some lubricant to the headlight adjusters…
- Close the bonnet (hood) carefully. Making sure the hood (bonnet) fits over the lights.

Image Gallery:
– click or tap any image to view full size –