Vehicle Connectors
Vehicles (car, van, lorry, motorcycle, etc), their connectors come in all shapes and sizes. How do you release the connectors, check the connections, modify and repair them?
Topics:
Releasing the Connector Wires:
It’s often useful to be able to release the wires from the connector, so that you can:
- Check the the condition of the individual connectors.
- Make repairs.
- Add additional wiring, etc.
There are many types of connector out there, so there will be differences. Nearly all of them (except connector blocks that are moulded around the cables during manufacture) will have a mechanism for releasing the individual cables. Often by pushing (one, sometimes two) metal tab(s) down to release the cable.
The text and images below, will give you the general gist of how to release the individual cables:
- Before removing the individual wires, make a note of where the wires go. It makes for a much easier job later, when reassembling.
- Release any connector block clips that may be preventing the individual cables from being released (if fitted).
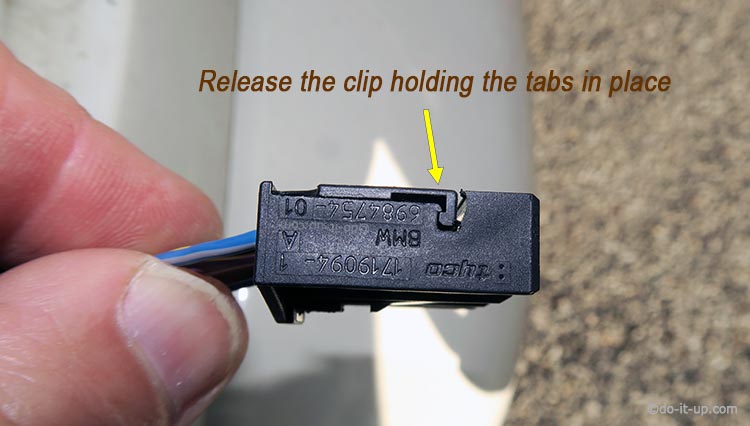
Connectors – Removing the Wires – Release the Clip Holding the Tabs in Place (if Fitted) 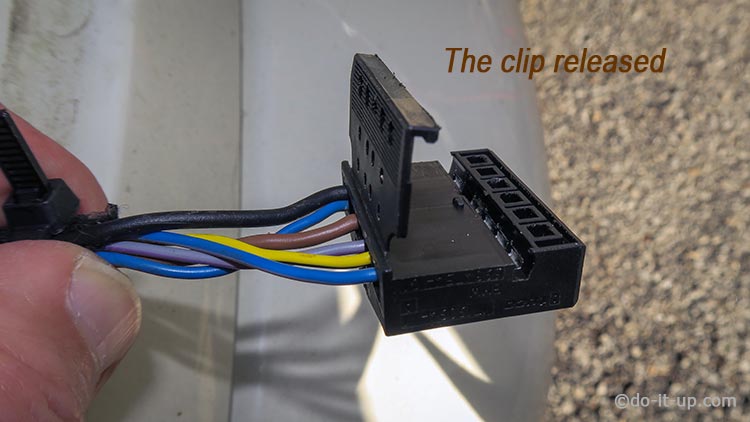
Connectors – Removing the Wires – Release the Clip Holding the Tabs in Place (Released)
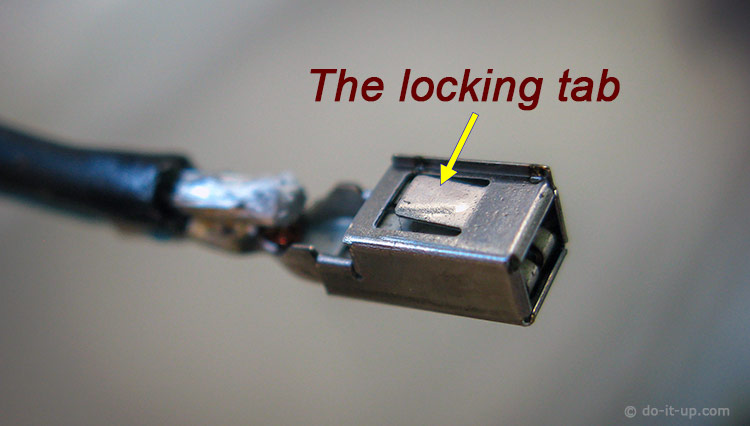
- Use a pointed object to depress the metal cable tab, so the individual cable can be released. Hold the connector in a position where you can’t accidentally stab yourself… It’s easily done!
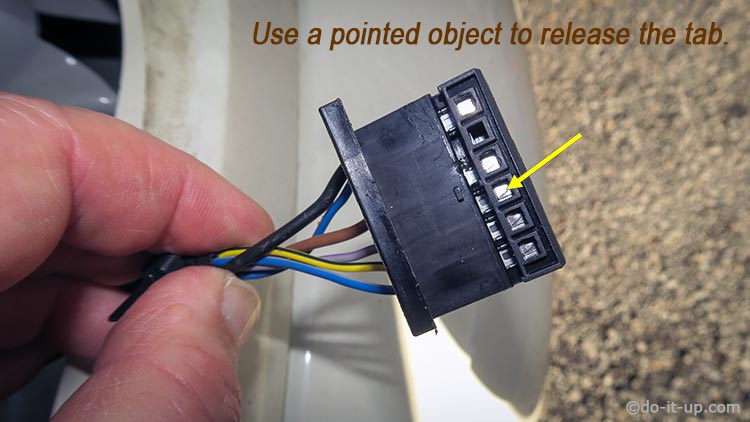
Connectors – Removing the Wires – Use a Pointed Object to Release the Tab 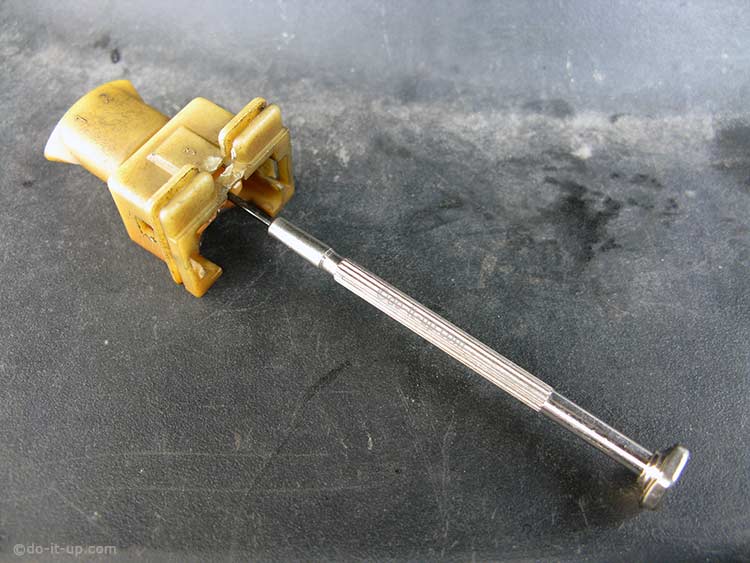
Vehicle Connectors – Removing the Wires – Use a Pointed Object to Release the Tab (Another Connector Example)
- You will probably need to gently pull the cable as you depress the cable tab (to release the cable).
- Don’t force the cable release. You want the connectors and the connector block to be in good condition, so the cables can be reinserted.
- The required individual cables should now be released.
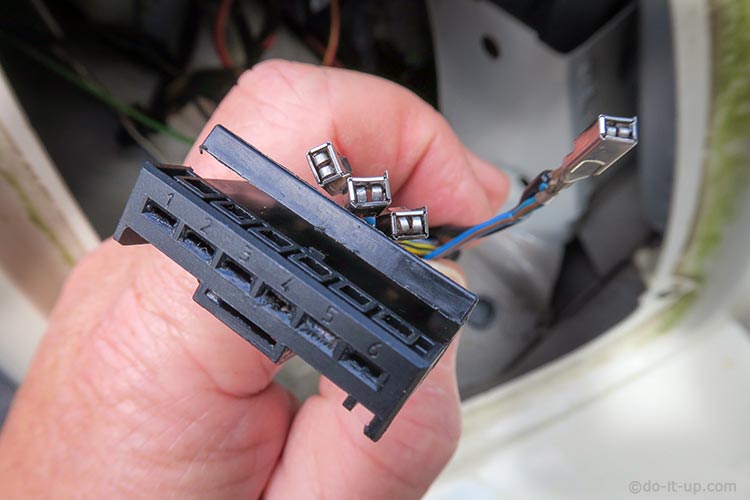
Connectors – Removing the Wires – The Cables Released from the Connector 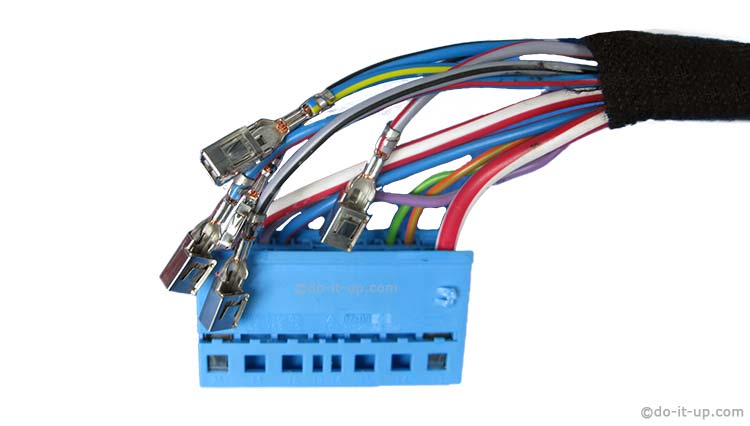
Vehicle Connectors – Removing the Wires – The Cables Released from the Connector
- On replacing the cables, you need to check the locating tabs have not been distorted. If they have, gently bend the individual metal cable tabs back into position.
- Slide the cables back into the connector housing (in the correct order and the correct way up!). You should hear the cable click into place.
- When complete, check the cables are in the correct positions (to ensure no errors). It’s easy to get the connections the wrong way round.
- Close the connector blocks tab (if fitted).
- Gently pull each cable individually to ensure the cables are all located correctly and none are loose.
Image Gallery:
– click or tap the image to view full size –