How to Replace a Wheel Valve Stem
I had gone to pump up my tire. When I connected the foot pump, I noticed that air was escaping. My initial thought was that the pump wasn’t connected to the valve properly. I tried reseating the foot pump on the valve, but air was still escaping?
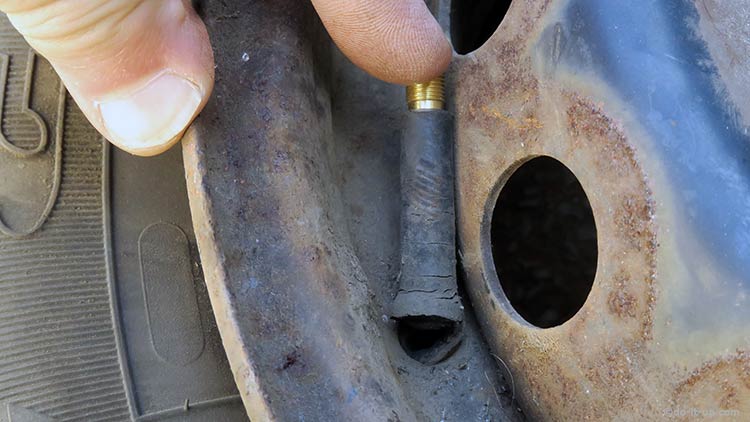
When I removed the air pump connection, I found that when I moved the valve stem with my finger, air would escape. Something wasn’t right?
On closer examination, I found that the valve stem had perished and there was a hole. It would need to be replaced (see the image below). It was kind of frightening… As this defect could have caused a sudden blowout of my tyre.
‘How to Replace a Valve Stem’

How do I Replace a Valve Stem?
Replacing a Valve Stem Without Removing the Tyre…
Trying to replace a valve stem without breaking the bead of a tire could result in damage, as you are forcing the valve stem into the hole the wrong way. It could lead to sudden loss of air from the tyre, a ‘blowout’. Valve stems are designed to pull through the inside edge of the wheel rim…
Replacing a valve stem is fairly straightforward and can be easy. It only requires a few tools. They are designed to ‘snap-in’, but should be tight fitting to prevent loss of air.
Topics:
- Video’s
- How do I Replace a Valve Stem?
- Inflating the Tyre:
- Other Similar Topics:
- Image Gallery:
Note:
Be careful with tyres… A tyre is a pressurised container. Any damage, or incorrect repair can cause a sudden loss of air which could be dangerous at speed (a blowout). Therefore please take care (any work you may carry out is at your own risk).
Testing for Leaks on a Wheel Valve Stem…

What to look for?
We can test the valve and valve stem with some soapy water (as long as there is air in the tyre), to find if we have a leak?
- Use a brush to apply the soapy water. Just apply a small amount on the valve. As you can see from the image, a small leak will give you some bubbles.

- To test the valve stem, brush some soapy water on the body of the valve (the non threaded part).
- If you don’t see any bubbles, move the valve stem from side to side with your finger. A leak may only be apparent if the valve stem is moved. If the valve stem is perished, moving the valve stem will open up any cracks that are there.
- If you still don’t see any bubbles, brush some soapy water on top of the valve stem (the threaded part), so it runs down onto the valve itself (inside the valve stem).
Note:
If it’s only the valve that’s leaking (bubbles coming from inside the threaded part on top of the valve stem), only the ‘Schrader’ wheel valve needs to be replaced. I have another article showing how to do this… ‘How to Replace a Wheel Valve‘ (link open in a new tab)…
To properly replace the valve stem, we need to ‘Break the tyre bead’.
Note:
Do not try and repair the existing valve stem! Failure (a sudden loss of air) could be dangerous at speed (a blowout). Always replace with a new.
Tools Required:
To remove a wheel valve stem, you need the following Tools:
- Two pieces of wood (for breaking the bead of a tyre) (link opens in a new tab).
- Valve Stem Puller (or pliers).
- A Screwdriver.
- An air Pump.
Notes:
Replacing a valve stem may be a bit intimidating, because you have to break the bead of the tyre. It was actually much easier and straightforward than I first thought. It only requires a few inexpensive tools (unless you use a trolley jack to break the bead of the tyre).
Breaking the Tyre Bead:
The Tyre has Been Pushed off the Wheel Rim:
I have a another article on how to break a tyre bead. Please follow the link for more information ‘How to Break the Bead of a Tyre‘ (link opens in a new tab)…
There are two easy methods to ‘break the bead’. Use the links below to go direct to each method: (links open in a new tab)…
- Using a Trolley Jack:
- Using Two Bits of Wood: (super easy)…
Note:
The second method (Using Two Bits of Wood) appears to be a much easier and safer option?
Replacing a Broken & Perished Wheel Valve Stem:
Once the tyre bead has been broken* (the tyre has been pushed off the wheel rim), we can replace the valve stem…
* (link opens in a new tab)…


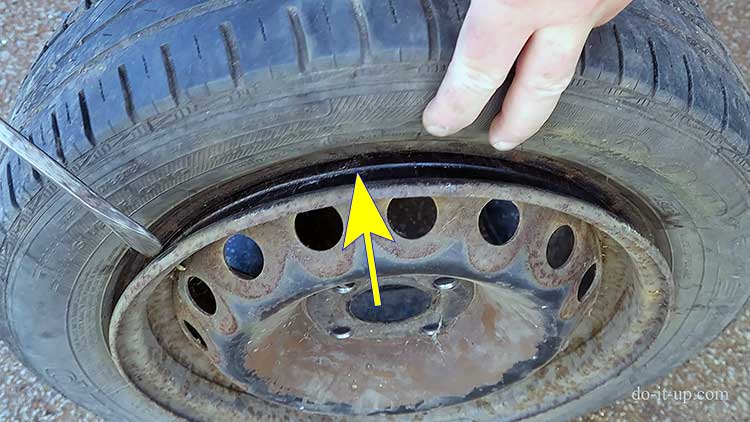
- As the valve stem is broken and perished, we can just pull the top part off!

- This leaves the bottom part of the valve stem behind. Push this through the rim with a screwdriver
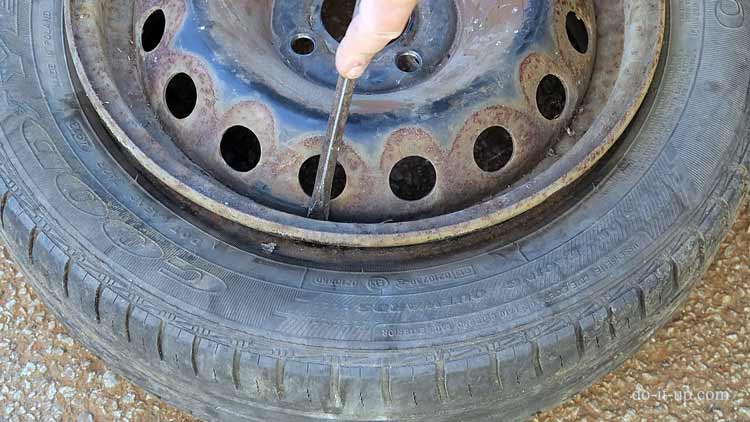
- Remove the bottom of the valve stem from the tyre (so it doesn’t rattle around inside). Use Pliers, not your fingers!
- Find the valve hole and check for any corrosion (on both sides).
- Note how the bulbous end of the ‘snap-in’ wheel valve stem uses air pressure (pushing against it) to create a seal…

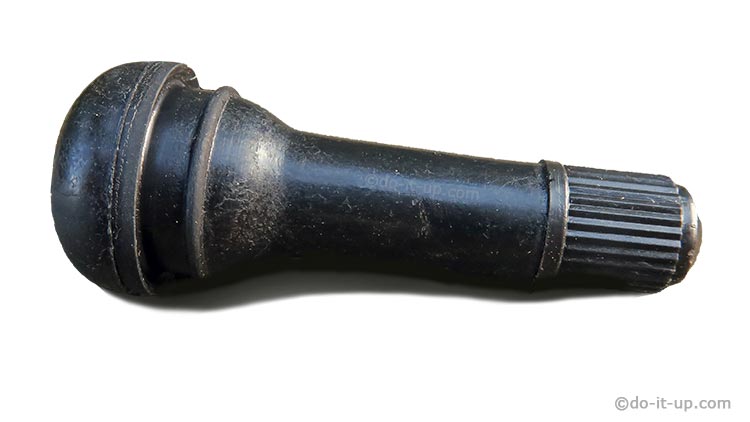
- Inserting the new ‘snap-in’ wheel valve stem.
– For Safety Reasons –
Do not lubricate the wheel valve stem with oil… Oil can make the rubber perish?
This could cause a sudden loss of air (a blowout)!
Use silicone grease instead, because this does not perish the rubber.
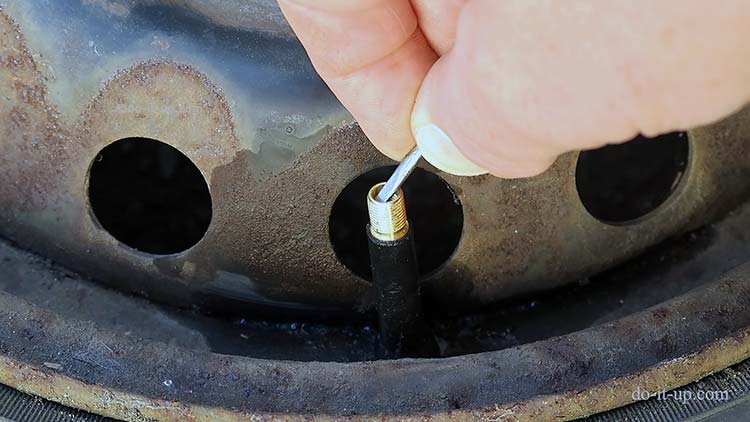
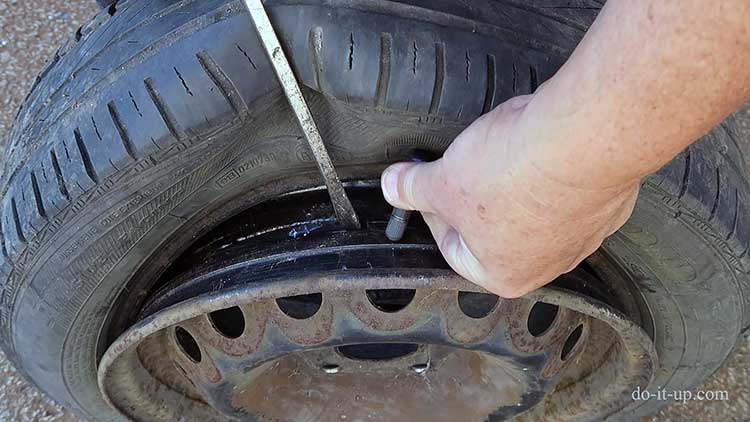
- Use a wheel valve stem pulling tool to fix the valve stem in place. This screws onto the valve stem and makes it easier to pull the valve stem into place…

- If you don’t have a wheel valve stem puller, you can use pliers (see below).
– Stop! –
Make sure you don’t damage the valve stem with the pliers!

- You may need to use your foot to hold the wheel down when you pull the valve stem into place.
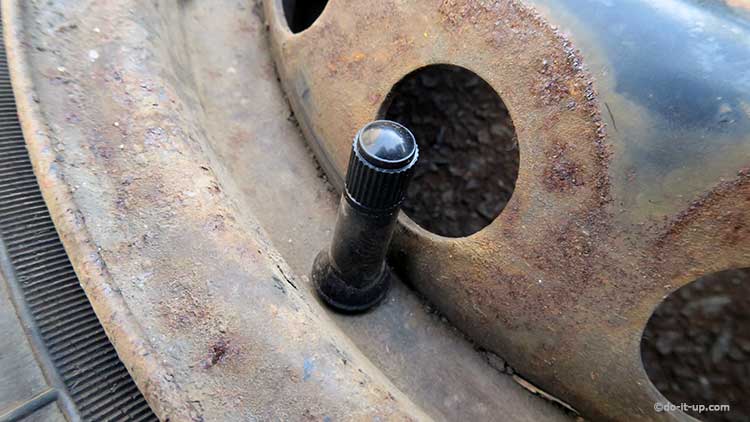
- Check the ‘snap-in’ wheel valve stem is seated correctly.
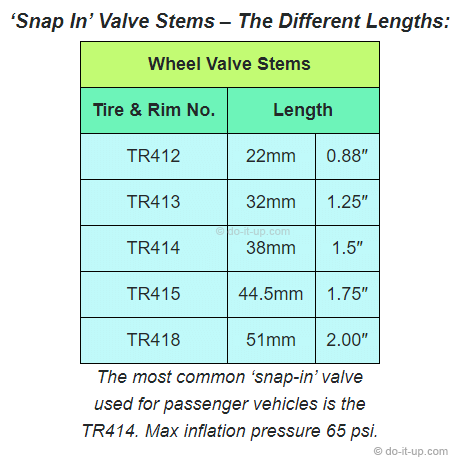
The Different Types of Wheel Valve Stem:
The length of the valve stem is specified using the following references (see the table below):
‘Snap In’ Valve Stems – The Different Lengths:
| Wheel Valve Stems | ||
|---|---|---|
| Tire & Rim No. | Length | |
| TR412 | 22mm | 0.88″ |
| TR413 | 32mm | 1.25″ |
| TR414 | 38mm | 1.5″ |
| TR415 | 44.5mm | 1.75″ |
| TR418 | 51mm | 2.00″ |
Notes:
- For the TP412 to TP425 range, the maximum inflation pressure is 65 psi.
- For the TR6 series (6**HP) range, the maximum inflation pressure is 80 psi.
- For the TR8 series (8**HP) range, the maximum inflation pressure is 100 psi.
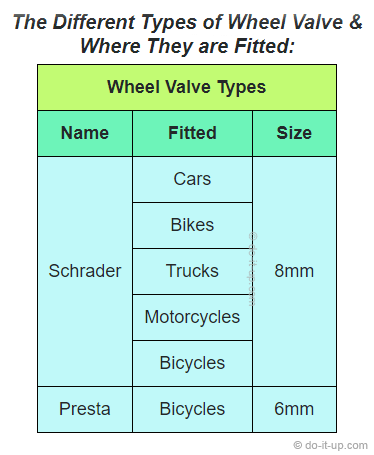
The Different Types of Valve:
There is usually only one type of valve fitted to an air filled wheel. A ‘Schrader’ valve. Whereas with bicycles, there are two types, ‘Schrader’ and ‘Presta’ (Presta is smaller, for narrow bicycle wheel rims).
The Different Types of Wheel Valve & Where They are Fitted:
| Wheel Valve Types | ||
|---|---|---|
| Name | Fitted | Size |
| Schrader | Cars | 8mm |
| Bikes | ||
| Trucks | ||
| Motorcycles | ||
| Bicycles | ||
| Presta | Bicycles | 6mm |
Replacing the Valve Stem – Do’s and Don’ts!
You don’t want a sudden failure that leads to a rapid deflation of the tyre, a blowout! (I added this section, as I had seen a few potentially dangerous practices when I was researching this article)…
Don’t use oils, greases, waxes etc:
- Unless they have been specified for use with tyres, valve stems and their valves, their application can often cause materials such as rubber to perish and fail.
- There are several lubricants that are safe to use with rubber (some synthetic oils??). But you would need to read the fine print, (and quite often, the fine print doesn’t tell you…). One of the most common rubber lubricants is silicone grease, (which is often found in the plumbing section, because it is safe to use with rubber seals, o’rings, etc). I love the stuff, as it can be used on hoses; makes it easy to get them on and off (don’t use too much though!). Electrical contacts, plastics, etc. Without fear of damage. The only trouble is, it only comes in small pots or tubes… But can last a long time, because you don’t need much.
Don’t modify components:
- I saw a video where someone was drilling (tapering) the valve stem hole to help insert the snap-in valve stem from the outside. Modifications can cause early failure of components, as the original design specification will have been changed.
Trying to repair valves and valve stems:
- Always replace valve stem components with new. A repair may lead to a sudden failure (and new parts aren’t that expensive… ).
The use of pliers to pull the valve stem through the wheel rim:
- If pliers is the only tool you have, make sure the pliers have no sharp edges. Thoroughly check the valve stem for any potential damage after insertion.
Trying to insert a ‘snap-in’ wheel valve stem from the outside (without pushing the tyre off the rim):
- By forcing the ‘snap-in’ wheel valve stem through the valve stem hole in the wrong direction, can lead to damage of the wheel valve stem. Once the ‘snap-in’ wheel valve stem is inserted this way, you cannot check for any damage on the inside, (because the tyre is still on the rim). A ‘snap-in’ wheel valve stem is only designed to be inserted from the inside!
Inflating the Tyre:
‘How to Inflate a Tyre Back onto the Rim’

Back to the list of topics:
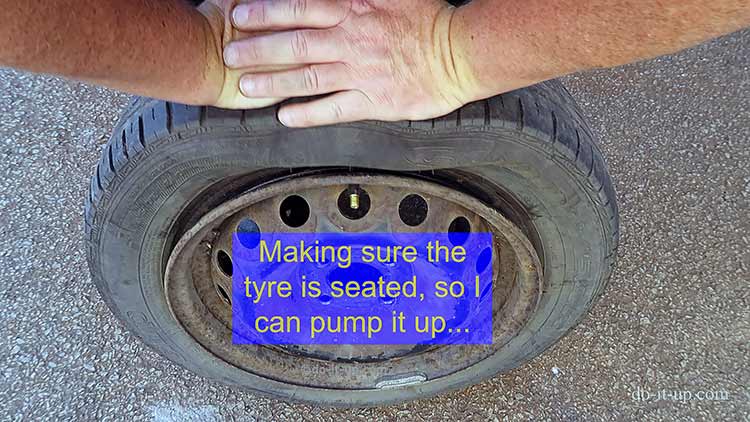
- Make sure the tyre is seated by manipulating the tyre. This is to ensure not much air escapes during the initial re-inflation of the tyre.
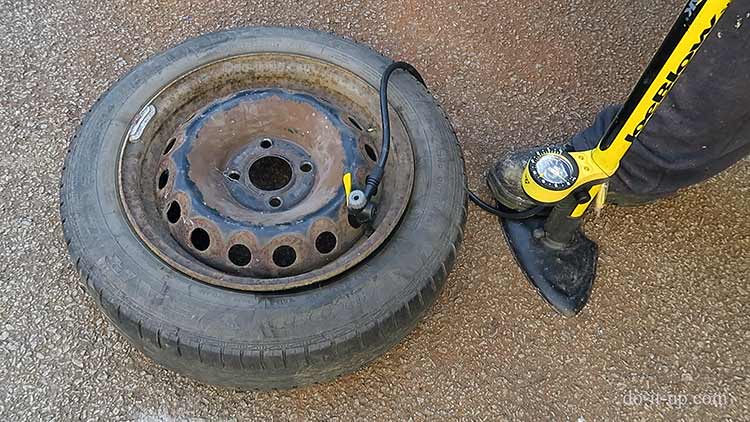
- Start pumping up the tyre…
- As the air inflates the tyre, the air will push the tyre bead back onto the rim. You may need to manipulate the tire a bit to help it seat. Keep your fingers well away from the edge of the rim! Letting some air out may help?
- Listen for the ‘pop’ as the tyre reseats itself back on the wheel rim.
- Once the bead of the tyre is back on the rim, inflate the tyre to the recommended pressure for your vehicle.
- Once re-inflated. Keep an eye on the tyre pressure to make sure there are no issues.
All Done…
Note:
Check the air pressure after a few hours, (and then a few days later) to make sure there are no leaks.
Other Similar Topics:
Image Gallery:
– click or tap any image to view full size –